



Qua theo dõi 4 phần vừa qua thì bạn đã có được kiến thức cớ bản về tạo và cấu hình file trả lời tự động unattend.xml. Trong phần này tôi sẽ chia sẻ một số component và thủ thuật khác mà bạn có thể sử dụng.
File trả lời tự động unattend.xml tổng hợp
Đây là những file mà tôi đã triển khai thực tế ở những bộ cài mà tôi chia sẻ trên website này. Tôi chia là 2 file autounattend.xml và unattend.xml với cấu trúc như sau:
File autounattend.xml chỉ có duy nhất 1 pass windowsPE và chỉ thực thi trong giai đoạn pass 1. Ngoài ra bạn cũng có thể thêm các pass khác vào đây nhưng bắt buộc tên file phải là autounattend.xml và đặt ở vị trí ngang hàng với file setup.exe trong thư mục gốc của bộ cài.
File unatend.xml sẽ bao gồm tất cả các pass còn lại và file này sẽ nằm ở vị trí C:\Windows\System32\Sysprep
Windows 7
autounattend.xml
                en-US

            1033:00000409
            en-US
            en-US
            en-US


                en-US

            1033:00000409
            en-US
            en-US
            en-US


                true

            true


                true

            true
unattend.xml
            1


            1


            true


            true


            true
            SE Asia Standard Time


            true
            SE Asia Standard Time


            1


            1


                    Add Computer Desktop Icon 1
                    1
                    cmd /c reg add HKLM\SOFTWARE\Microsoft\Windows\CurrentVersion\Explorer\HideDesktopIcons\ClassicStartMenu /v {871C5380-42A0-1069-A2EA-08002B30309D}.default /t REG_DWORD /d 0 /f


                    Add Computer Desktop Icon 2
                    2
                    cmd /c reg add HKLM\SOFTWARE\Microsoft\Windows\CurrentVersion\Explorer\HideDesktopIcons\NewStartPanel /v {20D04FE0-3AEA-1069-A2D8-08002B30309D} /t REG_DWORD /d 0 /f


                    Support URL
                    3
                    cmd /c reg add HKLM\SOFTWARE\Microsoft\Windows\CurrentVersion\OEMInformation /v Manufacturer /t REG_SZ /d MANHPC /f


                    Support URL
                    4
                    cmd /c reg add HKLM\SOFTWARE\Microsoft\Windows\CurrentVersion\OEMInformation /v SupportURL /t REG_SZ /d https://manhpc.com /f


                    Support URL
                    5
                    cmd /c reg add HKLM\SOFTWARE\Microsoft\Windows\CurrentVersion\OEMInformation /v SupportHours /t REG_SZ /d "8h00 - 22h00" /f


                    Support URL
                    6
                    cmd /c reg add HKLM\SOFTWARE\Microsoft\Windows\CurrentVersion\OEMInformation /v SupportPhone /t REG_SZ /d "+84 91 664 8537" /f


                    Add Computer Desktop Icon 1
                    1
                    cmd /c reg add HKLM\SOFTWARE\Microsoft\Windows\CurrentVersion\Explorer\HideDesktopIcons\ClassicStartMenu /v {871C5380-42A0-1069-A2EA-08002B30309D}.default /t REG_DWORD /d 0 /f


                    Add Computer Desktop Icon 2
                    2
                    cmd /c reg add HKLM\SOFTWARE\Microsoft\Windows\CurrentVersion\Explorer\HideDesktopIcons\NewStartPanel /v {20D04FE0-3AEA-1069-A2D8-08002B30309D} /t REG_DWORD /d 0 /f


                    Support URL
                    3
                    cmd /c reg add HKLM\SOFTWARE\Microsoft\Windows\CurrentVersion\OEMInformation /v Manufacturer /t REG_SZ /d MANHPC /f


                    Support URL
                    4
                    cmd /c reg add HKLM\SOFTWARE\Microsoft\Windows\CurrentVersion\OEMInformation /v SupportURL /t REG_SZ /d https://manhpc.com /f


                    Support URL
                    5
                    cmd /c reg add HKLM\SOFTWARE\Microsoft\Windows\CurrentVersion\OEMInformation /v SupportHours /t REG_SZ /d "8h00 - 22h00" /f


                    Support URL
                    6
                    cmd /c reg add HKLM\SOFTWARE\Microsoft\Windows\CurrentVersion\OEMInformation /v SupportPhone /t REG_SZ /d "+84 91 664 8537" /f


            1033:00000409
            en-US
            en-US


            1033:00000409
            en-US
            en-US


                true
                Work
                3
                true

            false


                    Control Panel View
                    1
                    reg add "HKEY_CURRENT_USER\Software\Microsoft\Windows\CurrentVersion\Explorer\ControlPanel" /v StartupPage /t REG_DWORD /d 1 /f
                    true


                    2
                    Control Panel Icon Size
                    false
                    reg add "HKEY_CURRENT_USER\Software\Microsoft\Windows\CurrentVersion\Explorer\ControlPanel" /v AllItemsIconView /t REG_DWORD /d 0 /f


                C:\ProgramData\Microsoft\Windows\Start Menu\Programs\Microsoft Edge.lnk
                C:\ProgramData\Microsoft\Windows\Start Menu\Programs\Google Chrome.lnk


            S.E. Asia Standard Time


                true
                Work
                3
                true

            false


                    Control Panel View
                    1
                    reg add "HKEY_CURRENT_USER\Software\Microsoft\Windows\CurrentVersion\Explorer\ControlPanel" /v StartupPage /t REG_DWORD /d 1 /f
                    true


                    2
                    Control Panel Icon Size
                    false
                    reg add "HKEY_CURRENT_USER\Software\Microsoft\Windows\CurrentVersion\Explorer\ControlPanel" /v AllItemsIconView /t REG_DWORD /d 0 /f


                C:\ProgramData\Microsoft\Windows\Start Menu\Programs\Microsoft Edge.lnk
                C:\ProgramData\Microsoft\Windows\Start Menu\Programs\Google Chrome.lnk


            S.E. Asia Standard Time
Windows 10 và Windows 11
autounattend.xml
            1033:00000409
            en-US
            en-US
            en-US


            1033:00000409
            en-US
            en-US
            en-US


                true


                true
autounattend.xml (bypass check hardware Windows 11)
            1033:00000409
            en-US
            en-US
            en-US


                true


                    1
                    reg add HKLM\SYSTEM\Setup\LabConfig /v BypassTPMCheck /d 1 /t reg_dword /f


                    2
                    reg add HKLM\SYSTEM\Setup\LabConfig /v BypassSecureBootCheck /d 1 /t reg_dword /f


                    3
                    reg add HKLM\SYSTEM\Setup\LabConfig /v BypassRAMCheck /d 1 /t reg_dword /f


                    4
                    reg add HKLM\SYSTEM\Setup\LabConfig /v BypassStorageCheck /d 1 /t reg_dword /f


                    5
                    reg add HKLM\SYSTEM\Setup\LabConfig /v BypassCPUCheck /d 1 /t reg_dword /f
unattend.xml
            1


            1


            1


            1


                    Allow Insecure Guest Auth
                    1
                    cmd /c  reg add HKLM\SYSTEM\CurrentControlSet\Services\LanmanWorkstation\Parameters /v AllowInsecureGuestAuth /t REG_DWORD /d 1 /f


                    Disable Reserves
                    2
                    cmd /c  reg add HKLM\SOFTWARE\Microsoft\Windows\CurrentVersion\ReserveManager /v ShippedWithReserves /t REG_DWORD /d 0 /f


                    Disable Acrylic Background On Logon
                    3
                    cmd /c  reg add HKLM\SOFTWARE\Policies\Microsoft\Windows\System /v DisableAcrylicBackgroundOnLogon /t REG_DWORD /d 1 /f


                    Copy To folder
                    4
                    cmd /c  reg add HKCR\AllFilesystemObjects\shellex\ContextMenuHandlers\{C2FBB630-2971-11D1-A18C-00C04FD75D13} /f


                    Move To folder
                    5
                    cmd /c  reg add HKCR\AllFilesystemObjects\shellex\ContextMenuHandlers\{C2FBB631-2971-11D1-A18C-00C04FD75D13} /f


                    Add This PC Desktop Icon 1
                    6
                    cmd /c  reg add HKLM\SOFTWARE\Microsoft\Windows\CurrentVersion\Explorer\HideDesktopIcons\ClassicStartMenu /v {871C5380-42A0-1069-A2EA-08002B30309D}.default /t REG_DWORD /d 0 /f


                    Add This PC Desktop Icon 2
                    7
                    cmd /c  reg add HKLM\SOFTWARE\Microsoft\Windows\CurrentVersion\Explorer\HideDesktopIcons\NewStartPanel /v {20D04FE0-3AEA-1069-A2D8-08002B30309D} /t REG_DWORD /d 0 /f


                    Support URL
                    8
                    cmd /c  reg add HKLM\SOFTWARE\Microsoft\Windows\CurrentVersion\OEMInformation /v Manufacturer /t REG_SZ /d AKIO /f


                    Support URL
                    9
                    cmd /c  reg add HKLM\SOFTWARE\Microsoft\Windows\CurrentVersion\OEMInformation /v SupportURL /t REG_SZ /d https://manhpc.com /f


                    Support URL
                    10
                    cmd /c  reg add HKLM\SOFTWARE\Microsoft\Windows\CurrentVersion\OEMInformation /v SupportHours /t REG_SZ /d 24/7 /f


                    Support URL
                    11
                    cmd /c  reg add HKLM\SOFTWARE\Microsoft\Windows\CurrentVersion\OEMInformation /v SupportPhone /t REG_SZ /d "+84 91 664 8537" /f


                    Allow Insecure Guest Auth
                    1
                    cmd /c  reg add HKLM\SYSTEM\CurrentControlSet\Services\LanmanWorkstation\Parameters /v AllowInsecureGuestAuth /t REG_DWORD /d 1 /f


                    Disable Reserves
                    2
                    cmd /c  reg add HKLM\SOFTWARE\Microsoft\Windows\CurrentVersion\ReserveManager /v ShippedWithReserves /t REG_DWORD /d 0 /f


                    Disable Acrylic Background On Logon
                    3
                    cmd /c  reg add HKLM\SOFTWARE\Policies\Microsoft\Windows\System /v DisableAcrylicBackgroundOnLogon /t REG_DWORD /d 1 /f


                    Copy To folder
                    4
                    cmd /c  reg add HKCR\AllFilesystemObjects\shellex\ContextMenuHandlers\{C2FBB630-2971-11D1-A18C-00C04FD75D13} /f


                    Move To folder
                    5
                    cmd /c  reg add HKCR\AllFilesystemObjects\shellex\ContextMenuHandlers\{C2FBB631-2971-11D1-A18C-00C04FD75D13} /f


                    Add This PC Desktop Icon 1
                    6
                    cmd /c  reg add HKLM\SOFTWARE\Microsoft\Windows\CurrentVersion\Explorer\HideDesktopIcons\ClassicStartMenu /v {871C5380-42A0-1069-A2EA-08002B30309D}.default /t REG_DWORD /d 0 /f


                    Add This PC Desktop Icon 2
                    7
                    cmd /c  reg add HKLM\SOFTWARE\Microsoft\Windows\CurrentVersion\Explorer\HideDesktopIcons\NewStartPanel /v {20D04FE0-3AEA-1069-A2D8-08002B30309D} /t REG_DWORD /d 0 /f


                    Support URL
                    8
                    cmd /c  reg add HKLM\SOFTWARE\Microsoft\Windows\CurrentVersion\OEMInformation /v Manufacturer /t REG_SZ /d AKIO /f


                    Support URL
                    9
                    cmd /c  reg add HKLM\SOFTWARE\Microsoft\Windows\CurrentVersion\OEMInformation /v SupportURL /t REG_SZ /d https://manhpc.com /f


                    Support URL
                    10
                    cmd /c  reg add HKLM\SOFTWARE\Microsoft\Windows\CurrentVersion\OEMInformation /v SupportHours /t REG_SZ /d 24/7 /f


                    Support URL
                    11
                    cmd /c  reg add HKLM\SOFTWARE\Microsoft\Windows\CurrentVersion\OEMInformation /v SupportPhone /t REG_SZ /d "+84 91 664 8537" /f


            true


            true


            1033:00000409
            en-US
            en-US
            en-US
            en-US


            1033:00000409
            en-US
            en-US
            en-US
            en-US


                    1
                    Open File Explorer to This PC
                    reg add "HKEY_CURRENT_USER\Software\Microsoft\Windows\CurrentVersion\Explorer\Advanced" /v LaunchTo /t REG_DWORD /d 1 /f


                    2
                    Control Panel 1
                    reg add "HKEY_CURRENT_USER\SOFTWARE\Microsoft\Windows\CurrentVersion\Explorer\ControlPanel" /v AllItemsIconView /t REG_DWORD /d 0 /f


                    3
                    Control Panel 2
                    reg add "HKEY_CURRENT_USER\SOFTWARE\Microsoft\Windows\CurrentVersion\Explorer\ControlPanel" /v StartupPage /t REG_DWORD /d 1 /f


                true
                1


                %programdata%\Microsoft\Windows\Start Menu\Programs\Google Chrome.lnk
                %programdata%\Microsoft\Windows\Start Menu\Programs\Word.lnk
                %programdata%\Microsoft\Windows\Start Menu\Programs\Excel.lnk


            MANHPC
            SE Asia Standard Time


                    1
                    Open File Explorer to This PC
                    reg add "HKEY_CURRENT_USER\Software\Microsoft\Windows\CurrentVersion\Explorer\Advanced" /v LaunchTo /t REG_DWORD /d 1 /f


                    2
                    Control Panel 1
                    reg add "HKEY_CURRENT_USER\SOFTWARE\Microsoft\Windows\CurrentVersion\Explorer\ControlPanel" /v AllItemsIconView /t REG_DWORD /d 0 /f


                    3
                    Control Panel 2
                    reg add "HKEY_CURRENT_USER\SOFTWARE\Microsoft\Windows\CurrentVersion\Explorer\ControlPanel" /v StartupPage /t REG_DWORD /d 1 /f


                true
                1


                %programdata%\Microsoft\Windows\Start Menu\Programs\Google Chrome.lnk
                %programdata%\Microsoft\Windows\Start Menu\Programs\Word.lnk
                %programdata%\Microsoft\Windows\Start Menu\Programs\Excel.lnk


            SE Asia Standard Time
Một số component tham khảo
Thêm driver vào bộ cài (không tích hợp vào file install)
- Tạo folder $WinPEDriver$ ngang hàng với folder sources.
- Thêm vào file AutoUnattend.xml bên dưới
            $WinPEDriver$


            $WinPEDriver$
OEMInformation
Việc thêm thông tin OEM vào hệ điều hành ngoài cách chạy lệnh add vào registry thì chúng ta còn có cách sử dụng lệnh
                %windir%\Windows\System32\oemlogo.bmp
                AKIO
                08:30 - 16:30
                +84 91 664 8537
                Trang chủ


                %windir%\Windows\System32\oemlogo.bmp
                AKIO
                08:30 - 16:30
                +84 91 664 8537
                Trang chủ
hoặc:
                %windir%\Windows\System32\oemlogo.bmp
                AKIO
                08:30 - 16:30
                +84 91 664 8537
                Trang chủ


                %windir%\Windows\System32\oemlogo.bmp
                AKIO
                08:30 - 16:30
                +84 91 664 8537
                Trang chủ
Lệnh này chỉ dùng khi bạn triển khai hàng loạt cho nhiều máy tính mới. Không sử dụng khi cài lại windows mà trên đĩa cứng đang có dữ liệu.
             %windir%\system32\OEM\manhpc.bmp
             MANHPC Theme


             %windir%\system32\OEM\manhpc.bmp
             MANHPC Theme
Enable tài khoản Administrator built-in
            EnableAdmin
            1
            cmd /c net user Administrator /active:yes


            EnableAdmin
            1
            cmd /c net user Administrator /active:yes
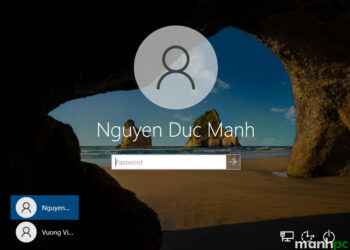
Tự động đăng nhập vào tài khoản Administrator
Để tự động đăng nhập vào tài khoản Administrator cao nhất của hệ thống khi cài đặt Windows thì bạn cần phải enable nó lên trong settings pass=”specialize”. Tiếp theo bạn thêm đoạn bên dưới vào settings pass=”oobeSystem”.
                true
                3
                true
                true
                true
                true
                true


                true
                3
                true
                true
                true
                true
                true
SYSTEM VARIABLES
SYSTEM:
%systemdrive%             > C:
%homedrive%               > C:
%windir%                  > C:\Windows
%systemroot%              > C:\Windows
%programfiles%            > C:\Program Files
%programfiles(x86)%       > C:\Program Files (x86)
%commonprogramfiles%      > C:\Program Files\Common Files
%commonprogramfiles(x86)% > C:\Program Files (x86)\Common Files
%programdata%             > C:\ProgramData
%allusersprofile%         > C:\ProgramData
USER:
%userprofile%             > C:\Users\manhnd
%homepath%                > \Users\manhnd
%appdata%                 > C:\Users\manhnd\AppData\Roaming
%localappdata%            > C:\Users\manhnd\AppData\Local
%public%                  > C:\Users\Public
Một số lệnh tạo Partitions
CreatePartitions-BIOS:
rem == CreatePartitions-BIOS.txt ==
rem == These commands are used with DiskPart to
rem    create three partitions
rem    for a BIOS/MBR-based computer.
rem    Adjust the partition sizes to fill the drive
rem    as necessary. ==
select disk 0
clean
rem == 1. System partition ======================
create partition primary size=100
format quick fs=ntfs label="System"
assign letter="S"
active
rem == 2. Windows partition =====================
rem ==    a. Create the Windows partition =======
create partition primary
rem ==    b. Create space for the recovery tools
shrink minimum=500
rem       ** NOTE: Update this size to match the
rem                size of the recovery tools
rem                (winre.wim)                 **
rem ==    c. Prepare the Windows partition ======
format quick fs=ntfs label="Windows"
assign letter="W"
rem == 3. Recovery partition ====================
create partition primary
format quick fs=ntfs label="Recovery image"
assign letter="R"
set id=27
list volume
exit
CreatePartitions-BIOS-FFU:
rem == CreatePartitions-BIOS-FFU.txt ==
rem == These commands are used with DiskPart to
rem    create three partitions
rem    for a BIOS/MBR-based computer.
rem    Adjust the partition sizes to fill the drive
rem    as necessary. ==
select disk 0
clean
rem == 1. System partition ======================
create partition primary size=100
format quick fs=ntfs label="System"
assign letter="S"
active
rem == 2. Windows partition =====================
rem ==    a. Create the Windows partition =======
create partition primary
rem ==    c. Prepare the Windows partition ======
format quick fs=ntfs label="Windows"
assign letter="W"
list volume
exit
CreatePartitions-UEFI:
rem == CreatePartitions-UEFI.txt ==
rem == These commands are used with DiskPart to
rem    create four partitions
rem    for a UEFI/GPT-based PC.
rem    Adjust the partition sizes to fill the drive
rem    as necessary. ==
select disk 0
clean
convert gpt
rem == 1. System partition =========================
create partition efi size=100
rem    ** NOTE: For Advanced Format 4Kn drives,
rem               change this value to size = 260 **
format quick fs=fat32 label="System"
assign letter="S"
rem == 2. Microsoft Reserved (MSR) partition =======
create partition msr size=16
rem == 3. Windows partition ========================
rem ==    a. Create the Windows partition ==========
create partition primary
rem ==    b. Create space for the recovery tools ===
shrink minimum=500
rem       ** NOTE: Update this size to match the
rem                size of the recovery tools
rem                (winre.wim)                    **
rem ==    c. Prepare the Windows partition =========
format quick fs=ntfs label="Windows"
assign letter="W"
rem === 4. Recovery partition ======================
create partition primary
format quick fs=ntfs label="Recovery"
assign letter="R"
set id="de94bba4-06d1-4d40-a16a-bfd50179d6ac"
gpt attributes=0x8000000000000001
list volume
exit
CreatePartitions-UEFI-FFU:
rem == CreatePartitions-UEFI-FFU.txt ==
rem == These commands are used with DiskPart to
rem    create four partitions
rem    for a UEFI/GPT-based PC.
rem    Adjust the partition sizes to fill the drive
rem    as necessary. ==
select disk 0
clean
convert gpt
rem == 1. System partition =========================
create partition efi size=100
rem    ** NOTE: For Advanced Format 4Kn drives,
rem               change this value to size = 260 **
format quick fs=fat32 label="System"
assign letter="S"
rem == 2. Microsoft Reserved (MSR) partition =======
create partition msr size=16
rem == 3. Windows partition ========================
rem ==    a. Create the Windows partition ==========
create partition primary
rem ==    c. Prepare the Windows partition =========
format quick fs=ntfs label="Windows"
assign letter="W"
list volume
exit
CreateRecoveryPartitions-BIOS:
rem == CreateRecoveryPartitions-BIOS.txt ==
select disk 0
select partition 2
assign letter="W"
rem == extend the Windows partition ==
shrink minimum=500
extend
rem ==    b. Create space for the recovery tools
shrink minimum=500
rem       ** NOTE: Update this size to match the
rem                size of the recovery tools
rem                (winre.wim)                 **
rem ==    c. Prepare the Recovery partition ======
select disk 0
create partition primary
format quick fs=ntfs label="Recovery image"
assign letter="R"
set id=27
list volume
exit
CreateRecoveryPartitions-UEFI:
rem == CreateRecoveryPartitions-UEFI.txt ==
select disk 0
select partition 3
assign letter="W"
rem == extend the Windows partition ==
shrink minimum=500
extend
rem ==    b. Create space for the recovery tools
shrink minimum=500
rem       ** NOTE: Update this size to match the
rem                size of the recovery tools
rem                (winre.wim)                 **
rem === Create Recovery partition ======================
create partition primary
format quick fs=ntfs label="Recovery"
assign letter="R"
set id="de94bba4-06d1-4d40-a16a-bfd50179d6ac"
gpt attributes=0x8000000000000001
list volume
exit
HideRecoveryPartitions-BIOS:
rem === HideRecoveryPartitions-BIOS.txt ===
select disk 0
select partition 3
set id=27
remove
list volume
exit
HideRecoveryPartitions-UEFI:
rem === HideRecoveryPartitions-UEFI.txt ===
select disk 0
select partition 4
set id=de94bba4-06d1-4d40-a16a-bfd50179d6ac
gpt attributes=0x8000000000000001
remove
list volume
exit
Bài viết có tham khảo một số thông tin từ trang chủ Microsoft. Bạn có thể copy các lệnh bên trên tại đây.
Xem thêm:
- Hướng dẫn tạo và cấu hình file trả lời tự động unattend.xml – Phần 1
- Hướng dẫn tạo và cấu hình file trả lời tự động unattend.xml – Phần 2
- Hướng dẫn tạo và cấu hình file trả lời tự động unattend.xml – Phần 3
- Hướng dẫn tạo và cấu hình file trả lời tự động unattend.xml – Phần 4


Ray ID: 8f3a2c1b9d4e5f6a · Performance & security by Cloudflare
site-verification-ok












Cảm ơn bạn, rất hay và ý nghĩa
Kiến thức mình có hạn nên làm chẳng được.
Nhờ bạn cho mình xin file trả lời Unattend.xml cho Win11 Enterprise 23H2
Mục đích: của file trả lời chỉ cần mở sẵn tài khoản administrator thôi ạ.
Bạn check mail nhé.
cảm ơn bạn nhiều nhé